Thursday, December 31, 2009

Cross Stitched Tilda


Tried some pinks this time and yup, I cheated!!!  Had some Martha Stewart hydrangea sticker flowers that I had stashed away and decided to use them instead of make my own.

Colored with the Prismacolor pencils and OMS again.  Used the Spellbinders mega scallop rectangle, Cuttlebug With Love embossing folder border, Creative Memories corner punch and a 1/4" circle punch for faux brads.

Appreciate you stopping by and any comments you are kind to leave!

Wednesday, December 30, 2009

New Year's Tilda


Tilda's ready for a New Year's Birthday!

Used Spellbinder Oval and Fancy Tag dies, Cuttlebug Birds and Swirls embossing folder, Stampin' Up! Modern Label and Wide Oval punches and stamp (Warmest Regards set), Martha Stewart Hydrangea punch, Punch Bunch Ash Leaf punch, and colored with Prismacolor Pencils and OMS.

More Tilda's coming!  Thanks for dropping by!

Monday, December 28, 2009

Snow Flowers


Well these aren't necessarily Snow Flowers, but they are white!!!  Decided after all the snow we got lately I needed to see flowers.  Maybe they should be Take a Break from the Snow Flowers!!!

Used a Bosskut flower die, a couple of sizes of sun and mega oak leaf Punch Bunch punches, the Martha Stewart branch punch and Stampin' Up oval punches.  Did some pin pricking around the Old Olive piece, added a piece of More Mustard and layered onto Natural White card stock.  Used a little More Mustard chalk on the flower centers before adding the sun pieces.

Thanks for stopping by!

Tuesday, December 22, 2009

Season's Greetings Tilda


Had to at least make one Holiday card with a Tilda image.  Used Prismacolor pencils with OMS on Tilda.  Spellbinder border and label dies, plus a Martha Stewart border punch, circle punches and holly punch by Punch Bunch.  Added a ribbon and a few rhinestones for bling.

Merry Christmas and Happy New Year to all of you!

Sunday, December 20, 2009

Sweet Angel


This is an adorable image from a marvelous children's book illustrator and author, Elizabeth O. Dulemba.  She generously offers fabulous coloring pages that work great as digi images for personal use only.  You can find her website here.   Be sure to read her angel policy to find out more.  Thank you Elizabeth for sharing your talents!!!

I used Stampin' Up! Shimmery White card stock.  The mat pink card stock is a beautiful piece with subtle shimmer roses.  Hard to see on the picture but it is gorgeous paper.  Sorry, don't know the brand name, but thanks to Angie who sent it from Aussie Land!!!  Used the Spellbinders Label 4, corner punch, Cuttlebug  Corner die and textile texture embossing folder.  Flowers and leaves are Punch Bunch, EK Success and Martha Stewart punches.  Colored with Prismacolor Pencils and OMS.  Sponged blue chalk over a cloud stencil for the angel background.  Used Crystal Effects on the eyes, halo and sleeve trim.  Accents of ribbon and pearls.

Now I should get back to working on Christmas cards!!!  Time is running out!
Thanks for stopping by and always appreciate any comments!!! 

Monday, December 14, 2009

Taken with Teal Tilda


Colored another cutie pie Tilda with Prismacolor Pencils and OMS!  Got a chance to use some other products too:  JustRite monogram frame and Hero Arts birthday wishes, Spellbinder circle dies, EK Success border punch, Martha Stewart border punch, Cuttlebug embossing folder border, and the Scorpal!  Can't see on the photo, but used a Stardust pen for highlights on Tilda.  Cardstock is Taken with Teal, Basic Black and white watercolor.


Glad you could stop by and so appreciate the comments!
Thank you!!!  It sure makes my day!

Saturday, December 12, 2009

Beautiful Christmas Card

Well I am the lucky recipient of a gorgeous card made with the Spellbinders poinsettia border.  I didn't get as good a picture of it, so sending you directly to Marion's site to see it!  It is awesome!!!  Thank you again Marion!!!!

Check it out here.....Marion's Christmas Card

Thursday, December 10, 2009

My First Tilda!


Friend Marion encouraged me to try some Magnolia Tilda's!  They are such cute girls and another fun thing to color.  Oh-oh, I can see another collecting problem!!!

Colored with Prismacolor Pencils and OMS, used Oval Plain and Scalloped Nestabilities, Cuttlebug dots embossing folder, Embossed background paper by ?, Punch Bunch and Martha Stewart punches.

Thanks for stopping by and of course, any comments you kindly leave is always appreciated!


This was a stamp I've had for a very long time and never even used it!  Was a little intimidated because I was afraid it is so detailed and thought it wouldn't show all the things in it separately.  Used a variety of colors of distress inks and it was so much fun!  Stamp is by Creative Impressons.  Will have to try this image again and make a red barn next time!

Thanks for stopping by!!!

Monday, December 7, 2009

Serene Scene


Tried my hand at a little watercoloring with the Distress Inks.  These inks blend really nice on a watercolor paper.   This was an image I had stamped, but not sure who the stamp was made by.  Might be Creative Impressions.

Thursday, December 3, 2009

Fun 3D Christmas Tree


This is just one way to make this fun tree.  Just think of the possibilities of different versions and decorations that could be used on these trees.  The tree is made with the Large Lilium punch and the trunk is just a rectangle piece  of card stock rolled up.  Also used Old Paper Distress Ink, Pesto Adirondack Ink, Stamp-unknown, Cuttlebug Snowflake Embossing Folder, Graphics 45 Print Paper, McGill Corner Punch, Punch Bunch Star Punch, Oval, Scallop and Ribbon Tag Spellbinder Dies, and Organdy Ribbon


Really like the easel cards and working with the color combination and papers, so had to try another version.

 
Before I glued the trees together, I set the pieces together and they reminded me of a Dr. Seuss type tree, so made these crooked for some character.   I saw this tree idea originally from
Thanks for stopping by!  Hope everyone is getting all their things ready for the holiday season!

Saturday, November 28, 2009

Easy Punched Poinsettia


Card from the past using the EK daisy large and medium punches for the poinsettia type flower.  Gold microbeads are glued in the center with Crystal Lacquer.   Added some punched holly and a Woodville leaf.  Red beads are strung onto gold wire with a layer of white mesh to accent the background.

Thursday, November 19, 2009

Cardinals in the Birch Trees


This card was inspired by some of Michelle Zindorf's work, but I use sponges rather than the brayer.  Had 4 birch tree stamps already, but when I saw this with the birds, it was another must have stamp!

Stamp with ColorBox black ink and emboss with clear EP.  Ink the trees with the Versamarker and emboss with clear EP.  Color cardinals with red marker and heat set.  Ink cardinals with Versamarker and emboss with clear EP.  Mask with torn Post-it Notes and sponge snow with Distress Ink.  Punch out circle for mask and sponge around the circle and the rest of the sky.

Don't know if Colored Embossing Markers are even available any more, but that would have been ideal for coloring the cardinals instead of the way I did it.  

Stamp by Northwoods, Faded Jeans Distress Ink, Black Color Box Ink,  Versamarker, Clear Embossing Powder, Red Tombow Marker, large circle punch, Post-it Notes for the masking and sponges.

Tuesday, November 17, 2009

Out of the Box Water Color


I water colored with Tombows and water brush.  Image is Stampendous, words by Stampin' Up!, Tag die Spellbinders, Embossing Folder Cuttlebug and Fiskars paper trimmer.

Fun technique is to have part of the image going past the original shape.  I did this one with the Fiskars paper trimmer by cutting a straight line up to the image, lift the blade up and move past the image, drop the blade back down and continue cutting straight.  Then hand cut the extended part of the image.  

The black is glossy card stock.  I really like the black glossy card stock to go with the black embossed image, but it is hard to photograph..too much glare.  Even tried a piece of tissue paper over the flash.  Anyone have any ideas to avoid the glare, please let me know!

Still thinking flowers and I should be working on more Christmas!!!

Monday, November 16, 2009

Christmas Card


Pulled out an image I colored some time ago with Tombow Markers and thought I should finally put it on a card.  Used the Deco Fan corner and border combination from Martha Stewart, added Cuttlebug corner scrolls and some rhinestones and Stickles.

Thanks for stopping by!

Thursday, November 12, 2009

Color Fusion Sky


This is an easy card with the trees embossed with black pigment ink and clear embossing powder.  Then sponged in three blue inks.

Supplies:  Inkadinkado and Penny Black Stamps, Color Box Black Ink, Stampin' Up! Bashful Blue, Brocade Blue, and Not Quite Navy Classic Inks, Stampin' Up! Whisper White and Not Quite Navy Card Stock, Glossy Black Card Stock, brads, ribbon, sponges, mask, Stampin' Up! horizontal slot punch.

Monday, November 9, 2009

Lucky Me!!!


Tried my hand at Digital Images using Prismacolor Pencils and Gamsol (odorless mineral spirits).  I really like how the colors blend with the Gamsol.  Can't leave things flat, so popped up a JustRite stamp image and had to add just a few punched flowers.

Used an image I got through Mo's Digital Pencil Shop.  She is a child's book illustrator and writer and I love her cute characters.  They just draw out feelings!

Other Supplies:  Just Rite Font and Circle Border, Martha Stewart Botanical Scallop, Circle Nestabilities, Punch Bunch 3 Flower Corner Punch & Ash Leaf, Distress Ink-Antique Linen, Canson Water Color Paper

Sunday, November 8, 2009

Card Kit Drawing Winner

Congratulations Tammie, you were the name drawn for the card kit.  Please contact me at PJSkogquist@gmail.com with your home address so I can get the kit mailed off to you!

Wednesday, November 4, 2009

Christmas Card, Drawing for a Kit and a Fun Snowman

Well I was informed today from a friend that I had not put anything new on my blog for some time!  (Thanks Lin!)  Can't get by with anything!!!  So I'll put a couple things on, now that I figured out where my camera was!!!

This is a similar version of a card I did for a Floral Punch Class.  I happen to have an extra kit, so if you are interested, anyone leaving comments or signing on as a follower will be put in a drawing for the kit to make this card.  It is pretty easy and everything is ready except the white dots that you can add with a white gel pen.  I even scored the leaves for you!  It will include a picture with a couple of tips on the construction.  You also need foam tape and adhesive to put it together.  Saturday, Midnight DST, November 7th I'll draw a name and you will have till Tuesday, Midnight DST November 10th to contact me by E-mail with your snail mail address.
International welcome too!!!

Supplies used:  Verse is a very old Stampendous stamp, Spellbinders Lattice Borderabilities, Large Circle Nestabilities, Inverted Circle Nestabilities, Cuttlebug Floral Corners Die and Snowdots Embossing Folder, Punch Bunch Large Holly punch, White Gel Pen, Gold Cord, Red Beads, Gold Wire and Foam Tape


Oh what fun it is to use Snowmen stamps!  But of course, I had to 3D him too!  Colored this with Ranger Distress Inks and a waterbrush.  Sponged the edges with DI and added some Stickles of different colors.  Also used a Martha Stewart border punch, EK corner punch and added a gold cord bow.

JUST A TIP:  if you are like me with never ending growing supplies in your stamp or craft room.  The names are not on all the supplies we buy, only the packaging.   So when it comes to making up supply lists, it is hard to track down the actual name of things sometimes.  Well, my memory retention is not increasing like my supplies!!!  So when I get something new now, I am writing the name on it someplace with a permanent pen so when I list the supplies used on a card, it will be easier to find.
Oh, the joys of aging!!!!

Thank you for stopping by and I really appreciate the wonderful comments that you have left!  More things in the works!  How can I want another punch????  I don't know, but I do!!!! 


Saturday, October 31, 2009

Butterfly in Turquoise


This was a colorful 3D image for me, especially at this time of year.  I CAN use something other than earthy colors!!!  :)    Loved the turquoise and teal colors to work with.  Image is from Rubber Stamp Therapy (Link in left side column).  Cut out layers, pop up with foam tape.  Used the Sizzix Jelly Frame die and one of the tags from Spellbinders Tag Trio.  Stamp is Stampin' Up! Teeny Tiny Wishes.

Had a request about subscribing, so have a link on the left side to do that.  Still learning, so don't know if that's what I need, but let me know if it isn't!!!
Thanks for stopping by!  Drop in on the comments and say Hi!  Would love to hear from you!

Monday, October 26, 2009

A Little Dazzle

Made the purple accent flowers with a piece of wire and Flower Soft.  The white flowers are MS 16 Point Star punch.  Think it was called a Christmas Star when I bought it last year.  MS Royal Butterfly punch and the white accent piece is punched with the Fiskars Border/Corner Lattice Entertain You punch.  For the leaves, they are from the Leone Em Super Giant Rockfern and the Nankong twig punches.
The glittered paper was provided by friend Marion from Australia.
Added clear Dew Drops with a little glitter on those too!
Love how those Border/Corner punches work!  Really easy to use!

Saturday, October 24, 2009

3D Flower Cards


Was time to put together a couple of 3D cards.
Of course, just about everything I do is dimensional!!!
Used a couple of Martha Stewart punches and finally got out the dew drops, eyelets and a couple of charms for embellishing.  The 3D images are TBZ International.  Hard to see on the photos, but I really like these because they have a touch of gold and are embossed.

Thursday, October 22, 2009

Poinsettia Nestabilities


This Spellbinder die sure made it easy to make a Poinsettia.  Wanted to try something different rather than the traditional red flower, so chalked a white pearlized paper with pink and green for the leaves.  The glittered background paper makes for an elegant look and I could see using this card not only for a Christmas card, but also a December wedding or birthday card.

Couple More Fall Flower Cards


Here are the other two cards I made with the same backgrounds.  Used Martha Stewart, Punch Bunch, Stampin' Up! and EK Success punches.

Tuesday, October 20, 2009

Another Fall Flower


Just had a fabulous week with friends creating cards, watching movies and having a great time!  Here is one of the cards I made.

Had some of these background leftovers, so will show the cards I made with these over the next few days.  Was nice just to be able to add some flowers and I was done!

Background paper was an old Basic Grey paper.  Used the Stampin' Up! scallop punch for the flower along with the Martha Stewart cornflower punch and a Punch Bunch sun and a twig punch.  Also a Leone Em fern punch.  Sponged some Frayed Burlap Distress Ink on the flower petals and leaves.

Will add more cards later this week!  Love to see who is stopping by, so would be great to hear from you in the comments!

Tuesday, October 13, 2009

Zinnia Zest

 
Tried out my new Victoria Embossing Folder by Cuttlebug.  A design that will suit many occasions.  The Zinnia is my version of a fun flower made my Susan Tierney Cockburn in her book Paper Bouquet.  Punches are from Punch Bunch, stamps are clear acrylic by Inkadinkado and also used the Mega Curved Rectangle Nestabilities by Spellbinders.  Started this card with fall in mind, but with the burgundy and green, it leans more toward Christmas!

Friday, October 9, 2009

Lily Type Flowers

Made this some time ago, but figure it is the right colors for the season.  Used Punch Bunch punches for the lilies and leaves.  Not sure of the name of the background paper, but loved working with the fun colors!

Thursday, October 8, 2009

Turquoise Butterfly Lattice Card


Here is a birthday card I made a little while ago.
Used the Core'dinations paper so I could do a little sanding on the embossed areas.  Love that stuff!  Also used the Spellbinders Lattice Pendant including the left over pieces for the corners.  The butterflies are also Spellbinders Butterflies Two.  Embellished with ribbon, gold cord and some Dot Sparklers.

Friday, October 2, 2009

Fall Birthday Card

Birthday card I made for Nikky!  More fun fall colors!  Guess I really enjoy the autumn colors!

Used the dots and swirls Cuttlebug embossing folders and three sizes of Punch Bunch daisy punches plus the medium twig and the small fern punch.  Can't forget the butterfly!  All punches by Punch Bunch.


Friday, September 25, 2009

Fall Leaves


It is that time of year around here, the leaves are just starting to fall! 

This was a simple card with leaves made using Cuttlebug dies, the mosaic embossing folder, leaf print paper, and distress edged and  inked!  Popped up the leaves at different heights with foam tape.

Makes me think of hearing the rustling sound while walking through the fallen leaves and breathing in the brisk cool air!  I think I need to find a pile of leaves to jump in!  Just so long as I don't have to rake them!!!

Thanks for stopping by!  Take time to enjoy the beautiful fall weather!

Tuesday, September 22, 2009

Autumn Colors

Ah, Autumn with the rust, burgundys and yellow colors!
Just love those color combinations!


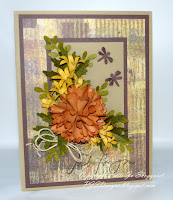
BossKut Blossom Die
Canadian Maple punch
Martha Stewart Frond punch
Martha Stewart Branch punch
Cuttlebug embossing folder-argyle
Sizzix Alphabars tag letters

Sunday, September 20, 2009

Friendship Card

With Fall coming, had to start using some earthy colors and make a mum like flower.  This card was made for a swap with the Friendship theme.

Punch Bunch daisy punches
Maple leaf punch
Martha Stewart branch punch
Punch Bunch Deco Flake punch
Spellbinders Mega Curved Rectangles
Friendship stamp by Inky Antics
Distress Ink-Old Paper


Friday, September 18, 2009


Here is an easy card using the Cuttlebug Swiss Dots and Victoria embossing folders, the SU eyelet border punch and a SU stamp set called God's Beauty.  Colored with SU markers.  Butterfly cut out and popped up.  Ruffles around the circle  made by crimping a strip of the border.

Saturday, September 12, 2009

Paper Bag Flower

Always looking for interesting paper to use in the flower making process.  Our LSS puts our shopping loot in great patterned bags!  Couldn't resist trying a flower out of this one.  They make wonderful backgrounds too!  Good excuse to go buy things to get a free bag!!! 

Thursday, September 10, 2009

Marion's Birthday Card


This was the first stand up card that I made for Marion's Special Birthday card. (Check previous posting of Zelda for info about the stand up card.)  I've used my Gazelle cutting machine for the frame and flowers.  The frame is from Mamaslegacy.com who shares some awesome free files and I'm sorry I don't know where the flower is from.  Branchy things are Martha Stewart Branch punch.  The leaves are from a sticker sheet that nice Carolyn shared with me.  The Spellbinders Borderability is the long 12" Grand Classic Lace.  Used a silver peel off butterfly sticker, rhinestones and hardware from Stampin' Up!  Oh and the new Cuttlebug embossing folder Victoria.

Wednesday, September 9, 2009

Zelda and Spooky

Had so much fun today playing with this card!  Couple more 3D prints from Nikky .  After I printed them, I covered with a cold laminate.  Wanted them glossy and it also stiffened the print then.  Love making the stand up cards, based it on an adorable owl card I saw on SCS that Manetta made here .  The tutorial for the stand up card part is here.  Finally made use of some of my colored stickles too!

Another Birthday Card


Lucky me I get to keep celebrating with another wonderful birthday card today.  This card was made by friend Angie from Australia and she has made flowers she calls Penny Flowers.  To see more of her wonderful artwork go here.  She has also made a presentation box which displays the card perfectly.  Sorry, my pictures just don't show how pretty they really are!  Thank you again Angie!!!  So special!!!

Tuesday, September 8, 2009

Birthday Cards Received

Well I am one lucky girl to have so many nice friends that make fabulous cards!  Nice way to get extra birthday cards is to sign up for a Birthday Swap too!!!  :)   I am enjoying the lovely work everyone has done and wanted to share them here too!


Thank you all so much, I love every one!!!  What a terrific group of talented ladies!!!

LinkWithin

Related Posts with Thumbnails